 16
16Module 16 - Image Processing in Python
Introduction to Images
Images are a captivating medium that enables us to visually communicate, express emotions, and capture the beauty of the world around us. In the digital age, images play a vital role in various fields, including art, advertising, entertainment, and scientific research. To work with images programmatically and perform various manipulations, Python provides a powerful library called "Pillow," which allows developers to load, edit, and save images in different formats effortlessly.
Before diving into image editing with the Pillow library, it is crucial to understand the underlying concepts of how image data is represented, the principles of image compression, and the process by which RGB color channels combine to produce stunning full-color images. Let's explore these fundamental concepts in detail:
Image Representation:
In the digital realm, images are represented as a grid of small units called pixels. Each pixel corresponds to a specific location in the image and contains information about the color and brightness of that particular point. The resolution of an image is determined by the number of pixels it contains. Higher resolution images have more pixels, resulting in a finer level of detail and clarity.
Image Compression:
As images can be quite large in size, image compression techniques are employed to reduce the file size while preserving visual quality to a certain extent. Different image formats use various compression methods, and three common ones are JPEG, GIF, and PNG:
- JPEG (Joint Photographic Experts Group): JPEG is a lossy compression format mainly used for photographs and natural scenes. It achieves compression by discarding some image information that the human eye may not notice, resulting in smaller file sizes. However, excessive compression can lead to visible artifacts and a loss of image quality.
- GIF (Graphics Interchange Format): GIF uses a lossless compression technique, which means it can reduce file sizes without sacrificing image quality. It is particularly well-suited for images with large areas of uniform color, such as graphics, logos, and animations. GIF compression works by reducing the number of colors. in an image, assigning them to an index, and then using a notation to represent horizontal lines of each color, resulting in a smaller file size.
- PNG (Portable Network Graphics): PNG also employs lossless compression and is popular for images that require high quality and transparency support. It is widely used for web graphics and digital art.
Each of these image compression types carries with it a book's worth of explanation. For the purpose of this chapter, we will focus on PNG and JPG images, which stick to a color model called RGB (for Red, Green, Blue).
RGB Color Model:
The RGB color model is the most common method of representing colors in digital images. In this model, each pixel is composed of three color channels: red, green, and blue. The intensity of each channel ranges from 0 to 255, where 0 represents no contribution of that color, and 255 indicates full intensity. By combining these three channels in different proportions, a wide array of colors can be represented. For example, pure red would be represented as (255, 0, 0), pure green as (0, 255, 0), pure blue as (0, 0, 255), and white as (255, 255, 255). Similarly, black would be represented as (0, 0, 0).
With a solid understanding of these essential concepts, we can now embark on our journey to explore the world of image editing using Python's Pillow library. Pillow provides a user-friendly and versatile interface for loading, processing, and saving images in various formats. Whether you aim to enhance image colors, apply filters, or create thumbnails, Pillow equips you with a rich toolkit to accomplish your image processing goals with ease and creativity. So, let's dive in and unlock the limitless possibilities of image manipulation with Python and Pillow!
Pillow Image Properties
An image object created using the Pillow library in Python is an instance of the Image class. This object represents a digital image and provides a wide range of properties and features for image manipulation.
Using the Pillow Library, you can create a new, blank image object, or create an image object by opening an existing image. NOTE: Opening an existing image as an image object copies the data from the original image into the object, so the original isn't changed unless you save the image object back as a file with the same name.
Creating a New Image Object
To create a blank image using the Pillow library in Python, you can use the Image.new() method. This method creates a new blank image with the specified dimensions and color mode. Here's how you can create a blank image.
from PIL import Image
# Define the size of the blank image (width, height)
width = 800
height = 600

# Create a blank image with a white background (RGB mode)
blank_image = Image.new("RGB", (width, height), color="white")

# Save the blank image
blank_image.save("path/to/blank_image.jpg")
In this example, we create a blank image with a white background using the RGB color mode. You can replace "white" with any valid color value to set the background color of the blank image. The image is saved as "blank_image.jpg" in the specified path.
You can also create a blank image with a transparent background using the RGBA color mode. In the RGBA mode, the image has an additional alpha channel that represents transparency. Here's how you can create a blank image with a transparent background:
from PIL import Image

# Define the size of the blank image (width, height)
width = 800
height = 600

# Create a blank image with a transparent background (RGBA mode)
blank_image = Image.new("RGBA", (width, height), color=(0, 0, 0, 0))

# Save the blank image
blank_image.save("path/to/blank_image.png")
In this example, we create a blank image with a transparent background using the RGBA color mode. The alpha channel is set to 0, indicating full transparency. The image is saved as "blank_image.png" in the specified path.
You can modify the width, height, and color mode to create blank images of different sizes and with various background colors as per your requirements.
Creating an Image Object from an Existing Image File
To create an image object from an existing image file using the Python Pillow library, you can use the Image.open() function. This function is the primary method for opening image files and returns an image object that you can use for various image processing tasks. Here's how you can do it:
from PIL import Image

# Open an existing image file
image = Image.open("path/to/existing_image.jpg")
In the above example, replace "path/to/existing_image.jpg" with the actual file path of your image file. The Image.open() function automatically detects the image format based on the file extension, such as JPEG, PNG, GIF, etc.
After creating the image object, you can perform a wide range of image manipulations and enhancements using the various methods available in the Pillow library.
Properties of an Image Object
Let's explore the essential properties and features of the Pillow Image object in detail:
Size (width and height):
The size property represents the dimensions of the image in pixels. It is a tuple containing the width and height of the image.
# Example:
from PIL import Image

image = Image.open("path/to/image.jpg")
width, height = image.size
print(f"Image size: {width} x {height} pixels")
Mode:
The mode property represents the color mode of the image, indicating how pixel values are interpreted to display colors. Common modes include "RGB" (Red, Green, Blue), "L" (grayscale), "RGBA" (RGB with alpha/transparency channel), etc.
# Example:
from PIL import Image

image = Image.open("path/to/image.jpg")
color_mode = image.mode
print(f"Color mode: {color_mode}")
Format:
The format property indicates the file format of the image, such as "JPEG," "PNG," "GIF," etc. When opening an image, Pillow automatically detects the format from the file extension.
# Example:
from PIL import Image

image = Image.open("path/to/image.jpg")
file_format = image.format
print(f"Image format: {file_format}")
Basic Image Operations
Resizing:
The resize() method allows you to change the dimensions of the image. It takes a tuple representing the new size (width, height) as an argument.
# Example:
from PIL import Image

image = Image.open("path/to/image.jpg")
new_size = (800, 600)
resized_image = image.resize(new_size)
Cropping:
The crop() method enables you to extract a rectangular region (box) from the image. It takes a tuple representing the coordinates of the left-upper and right-lower corners of the box as an argument.
# Example:
from PIL import Image

image = Image.open("path/to/image.jpg")
box = (100, 100, 300, 300)
cropped_image = image.crop(box)
Rotating:
The rotate() method allows you to rotate the image by a specified angle (in degrees). By default, rotation is performed around the center of the image.
# Example:
from PIL import Image

image = Image.open("path/to/image.jpg")
rotated_image = image.rotate(45)  # Rotate image by 45 degrees
Flipping:
The transpose() method lets you flip the image horizontally or vertically.
# Example:
from PIL import Image

image = Image.open("path/to/image.jpg")
flipped_horizontal = image.transpose(Image.FLIP_LEFT_RIGHT)  # Flip horizontally
flipped_vertical = image.transpose(Image.FLIP_TOP_BOTTOM)     # Flip vertically
Pillow ImageFilter Function
The Python Pillow Library provides several image filters that can be applied to an image using the ImageFilter module. These filters enhance or alter the appearance of the image by modifying pixel values based on specific algorithms. Here's an explanation of each image filter, its usage, and an example of how to apply it to an image.
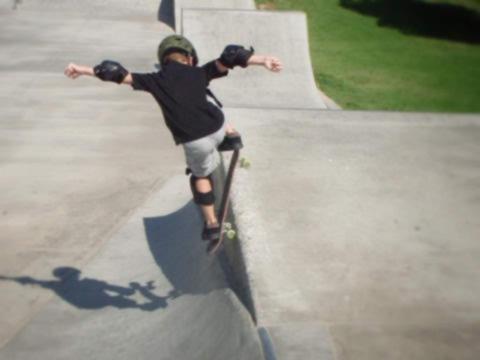
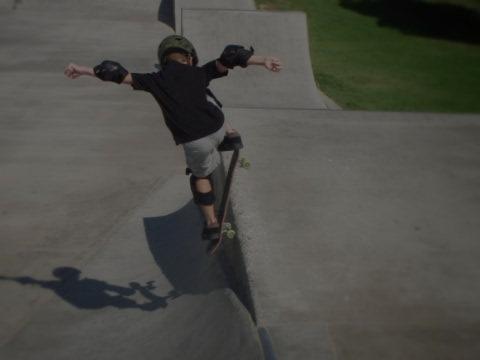
Let's use this image as our starting point:

BLUR
The BLUR filter applies a simple box blur to the image, smoothing out details and reducing sharpness.

Usage:
from PIL import Image, ImageFilter


blurred_image = original_image.filter(ImageFilter.BLUR)
Example:
from PIL import Image, ImageFilter


# Open the image


image = Image.open("path/to/image.jpg")


# Apply the blur filter


blurred_image = image.filter(ImageFilter.BLUR)


# Save the result


blurred_image.save("path/to/blurred_image.jpg")
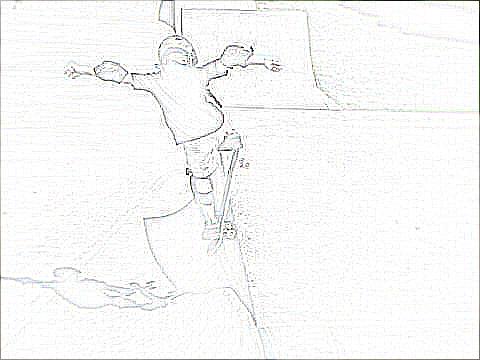
CONTOUR
The CONTOUR filter highlights the edges of objects in the image, emphasizing the boundaries between regions of different color or intensity.
Usage:
from PIL import Image, ImageFilter


contour_image = original_image.filter(ImageFilter.CONTOUR)
Example:
from PIL import Image, ImageFilter


# Open the image


image = Image.open("path/to/image.jpg")


# Apply the contour filter


contour_image = image.filter(ImageFilter.CONTOUR)


# Save the result


contour_image.save("path/to/contour_image.jpg")
DETAIL
The DETAIL filter enhances the details and textures in the image, increasing the contrast between adjacent pixels.

Usage:
from PIL import Image, ImageFilter


detail_image = original_image.filter(ImageFilter.DETAIL)
Example:
from PIL import Image, ImageFilter


# Open the image


image = Image.open("path/to/image.jpg")


# Apply the detail filter


detail_image = image.filter(ImageFilter.DETAIL)


# Save the result


detail_image.save("path/to/detail_image.jpg")
EDGE_ENHANCE
The EDGE_ENHANCE filter highlights the edges in the image, making them more pronounced.

Usage:
from PIL import Image, ImageFilter


edge_enhanced_image = original_image.filter(ImageFilter.EDGE_ENHANCE)
Example:
from PIL import Image, ImageFilter


# Open the image


image = Image.open("path/to/image.jpg")


# Apply the edge enhance filter


edge_enhanced_image = image.filter(ImageFilter.EDGE_ENHANCE)


# Save the result


edge_enhanced_image.save("path/to/edge_enhanced_image.jpg")
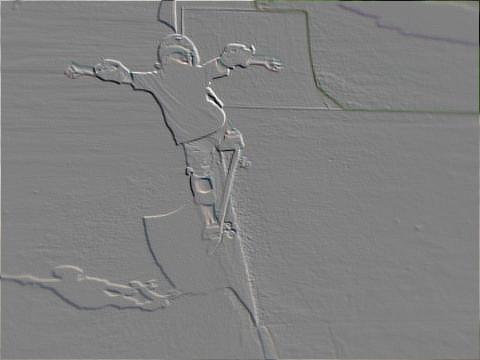
EMBOSS
The EMBOSS filter gives the image a 3D-like effect, making the edges appear raised or engraved.
Usage:
from PIL import Image, ImageFilter


embossed_image = original_image.filter(ImageFilter.EMBOSS)
Example:
from PIL import Image, ImageFilter


# Open the image


image = Image.open("path/to/image.jpg")


# Apply the emboss filter


embossed_image = image.filter(ImageFilter.EMBOSS)


# Save the result


embossed_image.save("path/to/embossed_image.jpg")
SHARPEN
The SHARPEN filter enhances the sharpness and clarity of the image.

Usage:
from PIL import Image, ImageFilter


sharpened_image = original_image.filter(ImageFilter.SHARPEN)
Example:
from PIL import Image, ImageFilter


# Open the image


image = Image.open("path/to/image.jpg")


# Apply the sharpen filter


sharpened_image = image.filter(ImageFilter.SHARPEN)


# Save the result


sharpened_image.save("path/to/sharpened_image.jpg")
SMOOTH
The SMOOTH filter applies a simple box smooth to the image, reducing noise and evening out color transitions.
Usage:
from PIL import Image, ImageFilter


smoothed_image = original_image.filter(ImageFilter.SMOOTH)
Example:
from PIL import Image, ImageFilter


# Open the image


image = Image.open("path/to/image.jpg")


# Apply the smooth filter


smoothed_image = image.filter(ImageFilter.SMOOTH)


# Save the result


smoothed_image.save("path/to/smoothed_image.jpg")
These image filters provide a simple yet effective way to enhance or modify the appearance of images using the Python Pillow Library. Experiment with different filters to achieve the desired visual effects in your images.
In some images, the effects might seem minimal. IF you want a stronger effect, try running the same filter on an image multiple times, or even combining filters.
Pillow ImageEnhance Functions
In addition to the ImageFilter functions, the Python Pillow Library provides several image enhancements that can be applied to an image using the ImageEnhance module. These enhancements adjust specific attributes of the image to improve its appearance. Let's explore each image enhancement, its usage, acceptable values for the enhancement factor, and their corresponding effects.
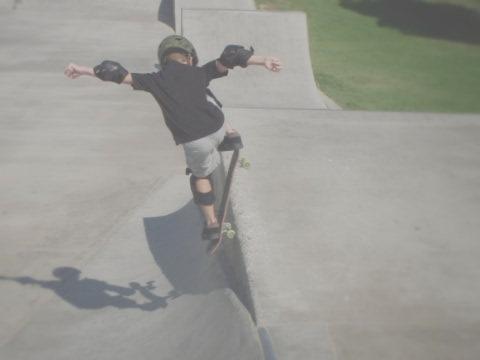
The following image will be used as a sample image to demonstrate the effects of each enhancement, using a factor of .5 and 1.5 for each one.

Brightness Enhancement
The brightness enhancement increases or decreases the overall brightness of the image.
| Factor: .5 | Factor: 1.5 |
 |  |
Usage:
from PIL import Image, ImageEnhance


enhancer = ImageEnhance.Brightness(image)


brightened_image = enhancer.enhance(factor)
Acceptable Range for Factor:
Any positive float value.
Effect:
- Values less than 1.0 will decrease the brightness, making the image darker.
- A value of 1.0 will keep the original brightness (no change).
- Values greater than 1.0 will increase the brightness, making the image brighter.
Contrast Enhancement
The contrast enhancement increases or decreases the difference between light and dark regions of the image.
| Factor: .5 | Factor: 1.5 |
 |  |
Usage:
from PIL import Image, ImageEnhance


enhancer = ImageEnhance.Contrast(image)


high_contrast_image = enhancer.enhance(factor)
Acceptable Range for Factor:
Any positive float value.
Effect:
- Values less than 1.0 will decrease the contrast, making the image less distinct.
- A value of 1.0 will keep the original contrast (no change).
- Values greater than 1.0 will increase the contrast, making the image more distinct.
Sharpness Enhancement:
The sharpness enhancement increases the sharpness and clarity of the image.
| Factor: .5 | Factor: 1.5 |
 |  |
Usage:
from PIL import Image, ImageEnhance


enhancer = ImageEnhance.Sharpness(image)


sharpened_image = enhancer.enhance(factor)
Acceptable Range for Factor:
Any positive float value.
Effect:
- Values less than 1.0 will decrease the sharpness, blurring the image.
- A value of 1.0 will keep the original sharpness (no change).
- Values greater than 1.0 will increase the sharpness, making the image clearer.
Color Enhancement
The color enhancement increases or decreases the intensity of colors in the image.
| Factor: .5 | Factor: 1.5 |
 |  |
Usage:
from PIL import Image, ImageEnhance


enhancer = ImageEnhance.Color(image)


color_enhanced_image = enhancer.enhance(factor)
Acceptable Range for Factor:
Any positive float value.
Effect:
- Values less than 1.0 will decrease the intensity of colors, desaturating the image.
- A value of 1.0 will keep the original color intensity (no change).
- Values greater than 1.0 will increase the intensity of colors, saturating the image.
It's essential to choose appropriate enhancement factors based on the specific effect you want to achieve. Experiment with different values to see how each enhancement affects the appearance of your images. Be cautious with extreme values as they may result in unrealistic or undesirable image modifications.
Show and Save Images
Using the Python Pillow Library, you can easily show and save an image after editing it. The library provides methods to display images using an external image viewer and save the modified image to a file. Here's how you can do it, along with some additional considerations:
Displaying an Image:
To show an image, you can use the show() method of the Image object. It opens the default image viewer on your system and displays the image. However, please note that the show() method may not work in some environments (e.g., remote servers or certain IDEs). It is primarily intended for use in local development environments.
from PIL import Image

# Open the image
image = Image.open("path/to/image.jpg")

# Display the image using the default image viewer
image.show()
Saving an Image:
To save an image after editing, you can use the save() method of the Image object. The save() method allows you to specify the file path where you want to save the modified image and the image format (e.g., JPEG, PNG, GIF).
from PIL import Image

# Open the image
image = Image.open("path/to/image.jpg")

# Perform image editing operations (e.g., resize, filter, etc.)
# ...

# Save the modified image to a new file
image.save("path/to/modified_image.jpg")
Additional Considerations:
- When saving an image, make sure to use a valid file path, including the correct file extension for the desired image format (e.g., ".jpg", ".png", ".gif").
- If you are editing and saving the image multiple times, be careful not to overwrite the original image unintentionally. Consider using different file names or directories for the modified images.
- If you are processing a large number of images, consider using a loop to automate the editing and saving process.
Example:
Here's an example that demonstrates both showing and saving an edited image:
from PIL import Image, ImageFilter

# Open the image
image = Image.open("path/to/image.jpg")

# Apply a filter (e.g., blur)
blurred_image = image.filter(ImageFilter.BLUR)

# Show the edited image
blurred_image.show()

# Save the edited image
blurred_image.save("path/to/blurred_image.jpg")
In this example, we open an image, apply a blur filter, show the edited image using the default image viewer, and finally save the blurred image to a new file. You can replace the filter with any other image manipulation operation according to your requirements.
Modifying Color Channels
Introduction:
In image processing, it is often necessary to manipulate individual color channels of an RGB image independently. This can be useful for various purposes, such as applying different filters or enhancements to specific color components, isolating certain color information, or creating artistic effects. The Python Pillow Library provides powerful tools to accomplish these tasks.
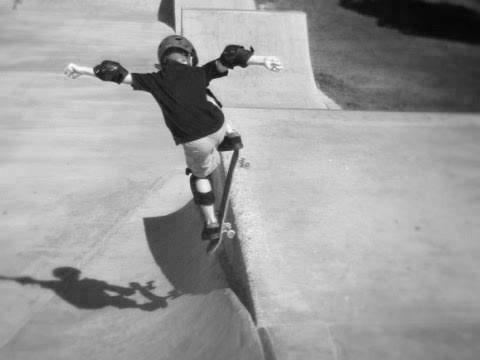
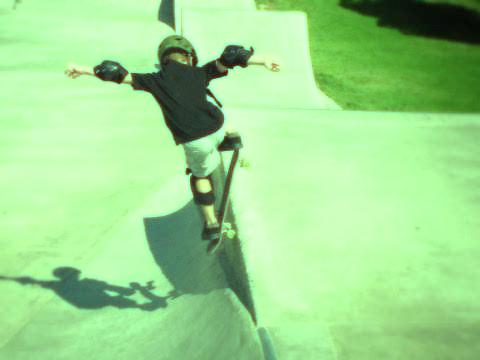
In this code example, we will use the Python Pillow Library to open an image file, split it into its RGB color channels (red, green, and blue), apply different filters and enhancements to each channel, save each modified channel as a separate image, and then recombine the channels to produce a final RGB image. We will use the "skate.jpg" image to demonstrate this process.
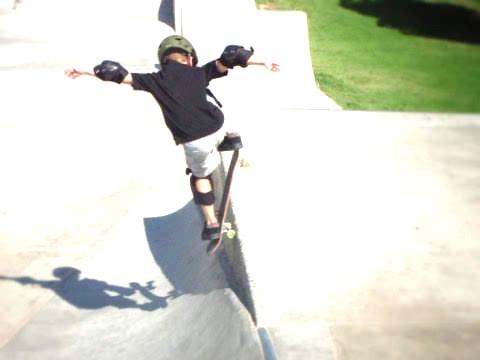
Starting Image:

Separated Channels:
| Red: | Green: | Blue: |
 |  |  |
Enhanced/Filtered Channels:
| Red: | Green: | Blue: |
 |  |  |
Final Image:
Why use this process?
- Separating color channels allows us to manipulate specific color components, providing greater control over image processing.
- Applying different filters and enhancements to individual channels can create unique artistic effects and highlight specific features in the image.
- Saving the modified channels as separate images can be useful for analysis and comparison.
- Recombining the modified channels enables us to create a final RGB image with customized color effects.
- This process is the basis for many Instagram-Type filters.
Python Code:
from PIL import Image, ImageFilter, ImageEnhance

def split_channels(image):
   # Split the image into individual color channels (R, G, B)
   r, g, b = image.split()
   return r, g, b

def apply_filter_to_channel(channel, filter_type):
   # Apply the specified filter to the channel
   filtered_channel = channel.filter(filter_type)
   return filtered_channel

def enhance_channel(channel, factor):
   # Enhance the channel with the specified factor
   enhancer = ImageEnhance.Brightness(channel)
   enhanced_channel = enhancer.enhance(factor)
   return enhanced_channel

def recombine_channels(red_channel, green_channel, blue_channel):
   # Recombine the color channels into a single RGB image
   return Image.merge("RGB", (red_channel, green_channel, blue_channel))

# Open the image
image_path = "images/skate.jpg"
original_image = Image.open(image_path)

# Split the image into RGB channels
red, green, blue = split_channels(original_image)

# Apply filters and enhancements to each channel
blurred_red = apply_filter_to_channel(red, ImageFilter.BLUR)
enhanced_green = enhance_channel(green, 1.5)  # Enhance with a factor of 1.5
sharpened_blue = apply_filter_to_channel(blue, ImageFilter.SHARPEN)

# Recombine the modified channels into a single RGB image
modified_image = recombine_channels(blurred_red, enhanced_green, sharpened_blue)

# Save the final recombined RGB image
modified_image.save("images/modified_image.jpg")
Videos for Module 16 - Image Processing in Python
16-1: Introducing Image Manipulation (8:19)
16-2: Explaining Image Formats (11:25)
16-3: Installing Pillow and Getting Images (5:31)
16-4: Basic Image Operations (7:10)
16-5: Cropping and Resizing Images (19:06)
16-6: Intermediate Image Manipulations (10:53)
16-7: The RGB Color Model (4:06)
16-8: Splitting RGB Channels for Manipulation (14:44)
16-9: Writing Text on Images (5:48)
16-10: A16 Project Explanation (4:06)
Activities for this Module
A16 - Image Processing App
The Challenge
Using what we covered in class, and the PILLOW library in Python, create an image editing app with the following abilities:
- two filters.
- the ability to open a file from a list
- the ability to show the results
- the ability to save a file after filtering.
You can download a starter file for this app in the files page for this module.
Submission Type
Please submit the complete program as a .py file.
Key Terms for Module 16 - Image Processing in Python
No terms have been published for this module.
Quiz Yourself - Module 16 - Image Processing in Python
Test your knowledge of this module by choosing options below. You can keep trying until you get the right answer.
Skip to the Next Question